Categories
electronics USB keyboard

More keyboard controller goodness

Progress has been made.

Firstly I’ve learnt to solder TQFP surface mount packages:

SMT soldering

And secondly I’ve used the resulting breakout widget to replace the Adafruit module on my breadboard:

keyboard controller

Top left you can see the pair of shift registers which drive the keyboard matrix columns through the bank of diodes and the ribbon cables at bottom left, bottom right is the soldered board from the picture above, bottom centre are the LEDs; red ones for numlock, capslock etc, green ones for debugging the state of the device. The ribbon cable off the bottom right of the board connects to the row outputs of the keyboard matrix.

Next step: design a board.

Categories
electronics software USB keyboard

Keyboard controller project update

It has been nearly two years since I mentioned the USB keyboard controller project. For most of that time, my primary keyboard at home has been driven by one or another bread-boarded incarnation of it. A few major points on the hardware side:

  • I’ve given up on the PIC and gone back to AVR. I ended up with some bugs which I couldn’t resolve, and I’m not sure they weren’t in the USB stack; I also wasn’t at all sure what the licensing would and wouldn’t allow me to publish.
  • This will mean learning to solder TQFP packages, and getting boards manufactured. Oh well.
  • I’ve decided to target the ATmega32U2 chip – less pins to solder the the U4. It gives up a handful of IO pins, the ADC, 1k of RAM,  and the ability to sense if the USB is plugged in when the device is externally powered. None of which matter for this project.
  • I’m using a pair of 74HC595 shift registers to drive the columns on the keyboard matrix. 16 pins driven for 3 pins on the AVR is a win. It does mean using a diode per column rather than just setting the undriven AVR pins to inputs (to avoid having outputs fight when multiple keys on the same row are held down) but again, I can live with that.
  • Being able to develop on the Adafruit 32U4 board means I have spare outputs for connecting debug LEDs to and more RAM for debug statements.

The software side has made massive advances over the last 3 days (yay for a long weekend!) and I think is now pretty much final. It presents a dual-interface USB device with a “boot keyboard” interface (all the standard keys) plus a generic HID interface for some some non-standard ones (I’ve assigned one to the “System Sleep” code which does exactly the right thing). Things I’ve learnt:

  • LUFA is awesome. Especially when you consider it was mostly written when the author was a student, and responds to bug requests very quickly (and the ones I found were extremely minor!). I found it so much easier to use than the Microchip USB stack as well. Oh, and the demos are brilliant for getting started.
  • Being able to use GCC is good. I don’t like proprietary development environments.
  • Using the hardware serial port for debugging messages is generally good (and you can run it at silly baudrates like 921600, although I’m not sure if that just ends up meaning bigger gaps between characters on the wire…), BUT:
  • Too much debugging output can cause oddness. I spent several hours chasing a “bug” where Linux would often wait 5 seconds between finding the first interface and the second one. Wireshark was showing “malformed packet” coming back from the device. I took out one debug statement which fired every time the device received a Control Request – and the problem vanished.
  • Oh, wireshark can dump the USB bus. Really handy!
  • Git is good. Should have started using it ages ago (I’ve been using RCS. Clearly I’m too old 🙂 )

Next steps?

  • I’ve ordered some 32U2 chips. I’ve also got some Adafruit 32 pin TQFP breakout boards. Hopefully I should end up with one successfully soldered to the other and integrated into the breadboard in place of the current 32U4 board.
  • Experiment with a bootloader. I think I’ll want one that only triggers if you hold a pin in a specific state when plugging the device in. Working with the bare chip I’ll have access to the HWB line, which I don’t on the board I’m using now.
  • Start working on a board layout in something like Eagle or DesignSpark PCB. Don’t think I’m masochistic enough for GEDA. I’ll see how I go soldering the TQFP chips before deciding if I go SOIC for the shift registers (and maybe a diode pack?).

If I can I’ll lay out the board such that it would make a good development board for other purposes. I might add another optional shift register for driving the LEDs – this keyboard only has 3, but even fairly normal keyboards can have 5, and the kernel source seems to recognize another 6 beyond that…

If you are crazy enough to want to build something similar, the code is up on github. The readme should give you a rough idea of how to set up the hardware – main thing to remember is that the scanning is done active low so I can utilize the pull-up resistors built into the chip rather than having to supply pull-down resistors, so the diodes go in backwards to what you might expect!


Categories
electronics remote temperature sensor sensors

Stephenson screen

A first attempt at a Stephenson screen for the outdoor temperature sensor. It is just a section of PVC pipe with a cowl on it to keep the rain (mostly) out, with a thinner pipe suspended on the inside, with the sensor suspended within that, near the lower end. The idea being that the inner pipe won’t see direct sunlight, and air between the pipes heated by the sun on the outer pipe will vent up and out, drawing fresh air in the bottom.

I’m currently testing it in parallel with the sensor at the back of the house (which gets badly sun-affected in the mid morning).

image

Categories
electronics sensors Uncategorized

Finalized currentcost interface for rPi

Having breadboarded it a couple of days ago, I’ve now finalized the serial interface between the Raspberry Pi and the Currentcost cc128, using some stripboard, dual header socket, CD4049, and a couple of bits of wire. Pretty straightforward; I removed a couple of pins from the header socket so I didn’t have to bridge from the outside of the socket back into the middle of the board, and made sure that all unused gates have their outputs floating and their inputs tied to something (in one case I’ve actually fed the input of a spare gate from the output fed to the rPi RX line; yes it will slightly increase the current consumption (as I’ve got an extra gate switching instead of staying static), but the effect will be tiny and it was easier than cutting the trace and fixing it all up with wires). The stripboard could have had the outer two rows of holes trimmed off but it doesn’t interfere with anything so I didn’t bother. The LEGO case has been improved now that I don’t have wires out the side (and has a transparent block near the LEDs on the rPi – works very well).

Parts
Note the two missing pins in the header. There's a missing cut on the stripboard, and one cut in the wrong place.
Top view
Top view
Bottom view
Bottom view, with missing cuts added and wrong cut bridged; yes my soldering is awful.
In situ
With cc128 meter and rj45 connection
Boxed and ready to go


Machine is now under the bed driving the (USB) bedroom speakers using shairport and feeding power data to my main server over MQTT.

Categories
electronics

Possible rough design for a better S/PDIF-> analog converter

We have this very cheap optical S/PDIF to analog converter which hangs off the back of the TV and feeds the amplifier. We use the TV for audio source switching, since all the other widgets plug into the TV (mostly via HDMI, one with component video and analog audio). This has 2 issues:

* When the converter isn’t getting any input (eg the TV is off), it generates white noise.

* Without the TV on, you can’t listen to music.

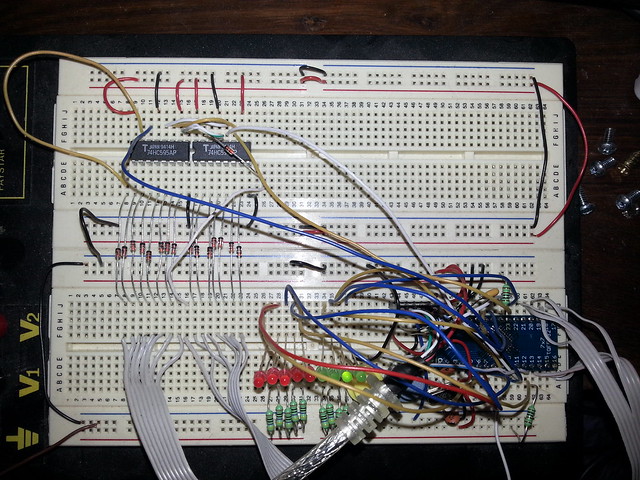
I’m contemplating building a better multi-input auto-switching S/PDIF interface, but there seem to be a few hurdles.

Firstly, none of the required chips seem to be available in PDIP packages. More disturbingly, a significant number of useful ones are no longer available in SOIC, but only in even smaller packages like TSSOP.

However, there are a couple of likely SOIC chips out there which seem to be worth investigating. There’s the CS8416, which can select between up to 8 different S/PDIF interfaces (or 4 if you don’t want to interface it with a micro), and spit out an I²S stream (and generate a recovered master clock from the input stream to drive the DAC). There seem to be a few people out there with devices built around this, so it appears to be feasible to make it work as a hobbyist.

DAC selection is a little more complicated. At first sight it would make sense to go with a matching Crystal Semi DAC, but I don’t think any of the newer designs are currently manufactured in SOIC. Eg the CS4392 – the datasheet says you can order it in SOIC, but it seems to only actually be available in TSSOP. So I’m looking at something like the Wolfson WM8521, which has the advantage of producing line-level output straight from the chip (but the disadvantage of requiring either 9V or 12V analog supply). Another advantage of the WM8521 is that it seems to be able to handle a master clock ratio of 128xFs all the way from 8kHz to 192kHz sample rates; this is important because in “hardware mode” the CS8416 can only switch master clock ratios on a hardware reset. An alternative would be the newer WM8726 which can run from 3.3V, but would need an external analog stage to get the output to line level. Or the WM8501 which has a 1.7Vrms line level output, and can run from 5V rather than 9/12V – assuming I can source one.

For the optical inputs, I’d ideally like one which runs off 3.3V and has an output pin to indicate valid data (or at least light) on the input. I’m sure I found one of these once but now I can’t seem to track it down again!

For prototyping this I think I’ll get a couple of the sparkfun SOIC-to-PDIP adapter boards and then I should be able to breadboard it – although I’m a little worried about the CS8416 PLL circuit as it seems to be fussy about capacitance. Hopefully that will just cause the PLL to take a bit longer to lock onto the signal rather than making it fail completely.

For the final object I’ll have to get a board made – I don’t think I can produce a board suitable for SOIC chips by hand.

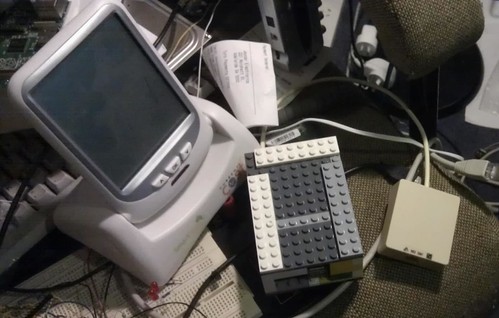
Of course there are a million other things I should do before this, so I don’t expect it to make progress at all soon. I have however scavenged a board with SOIC chips on it from a broken printer, so I can practice soldering on that before trying it on chips I care about.

Categories
electronics

pic18f4550 bootloader

I’ve made a couple of pin assignment tweaks to the Microchip HID bootloader. You’ll need MPLAB X, the C18 Lite compiler, and the Microchip Application Libraries. The bootloader I started with is in the Application Libraries under USB/Device – Bootloaders/HID/Firmware – PIC18 Non-J. I’m not sure about the license all this stuff operates under, so here are the changes I made as a zipped diff, and here’s the zipped hex file in case you happen to like my pin assignments better than the default microchip ones (I use RE2 for the bootloader sense and RC0:2 for LEDs; this leaves all of ports B and D available, plus A0:5 and E0:1 which happen to be 8 contiguous pins; it also leaves RC4:5 for USB and RC6:7 for serial).

Categories
electronics

pic18f4550 – first impressions

So I’ve decided to build a new circuit board to convert an old mechanical keyboard (NCD N97) from PS2 to USB. (A normal converter won’t work, as this keyboard only operates in “mode 3” which I very much doubt your average converter will know about). Initially I expected to use an Atmel ATmega32u4 or similar for this – but there’s no through-hole version of that chip, and I don’t want to have to produce a proper PCB and do surface mount soldering. (Atmel take note: I’d be using one of your chips if you did have a through-hole version!). My next thought was to embed a Teensy (or adafruit 32u4 breakout, or Teensy++) into the middle of some veroboard , but that means spending at least $20 on the chip, and I’d have a usb socket inside the keyboard which would then need to be routed to the outside etc.

A bit of googling led me to the Microchip PIC18F4550, which is available in 40pin DIP, and can be purchased from Futurlec for under $7 at time of writing. I order two, and a bunch of support bits (appropriate crystals etc).

Then I start to find that there are some fundamental differences between getting started in the PIC world compared to the AVR world (especially as a linux user who doesn’t want to spend the $$ on a proper programming tool like the PICkit 3).

It seems that the AVR-on-linux community has two big advantages – one is that there’s a nice GCC-based compiler which everyone uses, and the other is that avrdude supports a large number of different programmers, some of which are pretty easy to build. As a result, the community has pretty much a common toolset across the board. And thanks to the arduino project, you can even buy a bare chip with a bootloader on it fairly easily.

PIC-land is different. For a slightly-out-of-date view see this ladyada post. Apparently a GCC port isn’t possible, so there’s a bunch of different C compilers out there in use, most of which aren’t free. There also seems to be a dizzying variety of programming tools, most of which support a limited set of chips, seem to be rarely maintained, and only work with a small number of programmer hardware designs. On top of that, programming generally requires a 12V source (on a 18f4550 there is a low voltage programming mode, but it doesn’t seem to be widely supported and it eats a pin in the middle of an IO port). Which makes the programmer hardware more complicated. After several evenings googling and fruitlessly installing random unmaintained windows programmers (which is complicated by running windows 7 64bit, which doesn’t generally allow the sort of direct access to the parallel port these programs expected from Windows ME or whatever), I discovered that, at least for the 18f4550, the combination of Byron Jeff’s Trivial HVP Programmer circuit and the linux ‘pkp’ programmer which comes as part of PiKdev works nicely.

In addition, Microchip have their beta MPLAB X programming IDE available, which works on linux, and also have the “MPLAB C18 Lite Compiler for PIC18 MCUs” available for free-as-in-beer, along with the “Microchip Application Libraries”. The combination of these 3 allow you to build a bootloader which allows you to reprogram the chip using hid_bootloader. I’ve tweaked the bootloader slightly to suit me better; see my bootloader post.

Categories
electronics remote temperature sensor sensors

Finishing phase 1 of the remote temperature sensor

So, as seems to be the way with blogs, I never did get around to documenting the next stages of the project. A bit of a catchup is clearly in order.

Currently the transmitter is hanging under the eaves on the north side of the house where it is reasonably well hidden from the sun (given I am in the southern hemisphere that sounds all wrong, but there is a tree in the right place and no sensible place on the south side of the house), and in easy reach of a power outlet which happens to be on the outside of the house there. This is sub-optimal, as the temperature it measures is clearly heavily influenced by the house itself (on still nights, it doesn’t get anywhere near as cold as it should, but on windy nights it roughly matches the output of the nearest official weather station). I do have a LiPo battery and a “Lipo Rider” board (the 0.9 version I think), but I don’t currently have the solar panel to keep the battery charged, and I haven’t built something approximating a Stevenson screen yet (although I am planning something much simpler with a couple of concentric PVC pipes).

The temp-sens-bits zip file referenced below actually includes the rf receiver circuit and layout as well; it is extremely simple, since I just use the receiver sub-board to drive the receive pin on a cheap 5v USB to rs232 breakout, with a buffer in between to drive enough current to keep the usb chip happy.

schematic for the remote temperature sensor rf receiver circuit
RF receiver schematic

The receiver doesn’t actually have 20 pins, (it has 4 at each end) but I needed it to be the right length to generate the layout correctly:

veroboard layout for the remote temperature sensor receiver
veroboard layout for the receiver

The 7-pin header is where the usb-serial widget goes (which was from Little Bird but I don’t think is sold by them any more), and the chip is a 4049 cmos hex inverter buffering the output of the receiver.

Firmware is pretty simple; I’ve use the Arduino programming environment with the NewSoftwareSerial, OneWire and DallasTemperature libraries. The source is in the temp-sens-bits zip file (warning: it is ugly and includes loads of commented-out debugging). The code on the server which processes the output will be the subject of a later post.

Categories
electronics remote temperature sensor sensors

Remote temperature monitor project – transmitter complete!

After learning how to use VeeCAD and TinyCAD, I’ve got a layout, and I start the rather tedious process of cutting tracks (with a hand-held drillbit – I don’t happen to own a drill press… yet), then soldering the jumper wires, then the passive components, then measuring resistance here there and everywhere to make sure I don’t have bridged joints etc before finally attaching the chip and transmitter module – and I end up with this:

Component side view of the finished board

Solder-side view of the board
my not-very-good soldering...

And now I need to test it in the outside world, so a 9V battery and 78L05 regulator later, plus an “enclosure”:

Temperature monitor in a temporary outdoor "enclosure" (lunchbox)
Yum! Oh wait...

I stick it in the fork of a tree in the back garden, and go back inside to try it out.

First indications are not particularly encouraging – while my “U U U U U U U U ” sync header seems to be working reasonably well, only about every 5th message is actually making it back to the receiver uncorrupted. Still, I hack together a very quick python script to pull out the data (which does have a checksum), and then I move the receiver (still on breadboard) from the workstation to the server at the other side of the office.

And then discover something amazing – the noise has all vanished, and all my messages are coming through clean and clear with no garbage between transmissions! Something on my desk must be producing a reasonable amount of noise around 315MHz – my guess is it would have to be one of the monitors. Whatever, my noise problems are now basically solved, and the server is getting data!

Categories
electronics remote temperature sensor sensors

From breadboard to PCB – but how?

So I’ve got my project on breadboard (and a hand-drawn schematic on a scrap of paper) and now I want to put it on permanent substrate of some sort. So what are the options?

  • Hand designed, hand drawn PCB. However it has been 20 years since I’ve done this, and I don’t really want to get into the whole chemical etching thing just now.
  • Draw it on a computer (what software?), print it, get a UV lamp and some photoresist board, expose it – and chemical etch it.
  • Draw it on a computer, print it reversed on a laser printer, and use a sandwich maker or iron to transfer the toner to bare copperclad – and chemical etch it.

At this stage, none of these are appealing for a project of this size, especially as I’m not sure if I’ve been (re)bitten enough by the electronics bug to make the investment worthwhile. So I take the easy way out, and go for veroboard.

And then I discover how painful it is trying to produce a reasonably compact layout by hand on graphpaper, and decide that There Must Be a Better Way.

Much googling later (and a bit of playing around with gEDA – which I may revisit if I do get into designing custom boards), I end up trying out VeeCAD. I don’t like the fact that it is closed-source and windows-only, but it does run on wine and has a free edition. Still makes me feel dirty.

I then realize that to make it work for me, I’m going to have to find something to do schematic capture, and VeeCAD seems to work best with TinyCAD. Which is also windows-only, but is at least open-source and runs on wine.

So I capture a circuit diagram:

Circuit Schematic for remote temperature monitor
Circuit Schematic

And generate a verboard layout:

A verboard layout for the remote temperature sensor
Veroboard layout

The free version of VeeCAD doesn’t put component names or values on the veroboard layout, and I’ve obscured it slightly by mounting 2 of the resistors vertically (or nearly so), but you can probably figure out which bit is which if for some reason you are mad enough to want to reproduce it for yourself. Here is a zip file with the actual VeeCAD and TinyCAD data files: temp-sens-bits. I’m sure the veroboard layout could be done much better by someone who actually knew what they were doing 🙂